- 1. Utilize Your Room's Acoustics
- 2. Minimize Background Noise
- 3. Purchase or Create a Vocal Booth
- 4. Use a High Quality DAW or Mixing Software
- 5. Use High Quality Headphones
- 6. Record at 24-bit/44khz or Better
- 7. Find Your Optimal Microphone Placement
- 8. Invest in Your Mic Chain Configuration
- 9. Triple Check Your Mixes
- 10. Create Studio Ambiance
Transforming your home into a recording studio is an art form in itself, merging the aesthetics of your living space with sound engineering and the science of music. This requires technical equipment and insight, as well as a creative touch to inspire and elevate your compositions. The following home studio setup tips are great ideas for both novice and seasoned musicians alike, to transform any room into a sanctuary for musical innovation. With a little work on your room's acoustics, equipment, and atmosphere, your home studio can become the ideal spot to unleash your creative genius.
1. Utilize Your Room's Acoustics
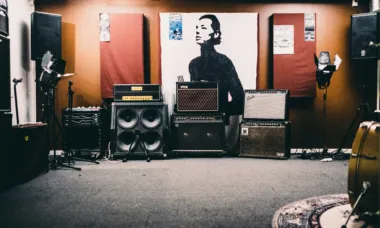
Understanding and manipulating room acoustics are essential skills for recording artists, especially when operating within home music studio ideas. The character and quality of your room can dramatically affect the recordings of vocals, guitars, drums, and other instruments, serving either as a unique asset or a significant hindrance.
In professional studios the room itself is designed to contribute the sound quality that artists seek out. However, in a typical home recording studio setup or a bedroom music studio, the room's acoustics might not always be ideal. It becomes crucial to determine whether your space adds a desirable quality to your recordings or detracts from them.
If your room enhances your sound, capturing its essence becomes beneficial. Techniques for this include careful placement of microphones to leverage natural reverb or reflections that complement your instrument’s tone. On the flip side, if your room’s acoustics are less than favorable—marked by excessive reverb, echo, or unwanted resonance—taking steps to mitigate these effects is necessary. This can involve positioning mics closer to the source to avoid capturing room sound, using directional mics to focus on the sound source, and deploying acoustic treatments like panels and diffusers to control reflections and bass traps to manage low-frequency buildup.
Moreover, customizing your space with acoustic treatments tailored to your specific needs can transform even challenging rooms into effective recording environments. This might include strategic placement of absorptive materials to deaden unwanted echoes and reflective surfaces to brighten sound where necessary. Understanding the interplay between your room's acoustics and your recording goals allows you to make informed decisions about mic placement, room treatment, and ultimately, the sonic character of your recordings.
Embracing the unique characteristics of your recording space, whether by enhancing its natural sound or by cleverly navigating its limitations, is key to producing high-quality, distinctive tracks in your home recording studio setup.
2. Minimize Background Noise

Achieving professional-quality recordings in a home setup often comes down to managing and minimizing background noise—a common challenge for home recording studio ideas. Whether it's from traffic, noisy neighbors, kids home from school, or household appliances, unwanted noise can compromise the clarity and quality of your recordings. Here's how to tackle it effectively in your bedroom music studio.
First, conduct a thorough audit of your space. Identify potential noise sources like air conditioners, refrigerators, or external hard drives. Turning off these devices before recording can drastically reduce background interference. Additionally, consider the timing of your recordings to avoid peak noise hours, especially if you're near busy streets or in a lively neighborhood.
Incorporate soft furnishings and sound-absorbing materials in your recording area. Rugs, curtains, and foam panels can help dampen echo and reduce noise transmission. For more focused sound isolation, portable sound booths or shields can be a game-changer, especially in multifunctional spaces like bedroom recording studios.
Utilizing a directional microphone also plays a pivotal role in isolating the sound source from unwanted ambient noise. These microphones pick up sound primarily from the front, minimizing background noise naturally. Pairing this with a microphone isolation shield can further enhance your recording's clarity.
Finally, a noise reduction checklist can be a valuable tool to ensure consistency and thoroughness in preparing your recording environment. This list might include checking windows for drafts, monitoring appliance cycles, and planning recordings around quieter times of day.
Incorporating these strategies into your home recording studio setup not only elevates the quality of your recordings but also brings you closer to achieving a professional sound from the comfort of your home.
3. Purchase or Create a Vocal Booth
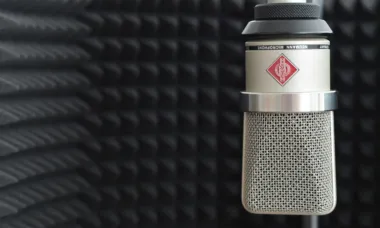
Achieving pristine vocal recordings is pivotal for any music production, highlighting the essence of incorporating a dedicated vocal booth into your home recording studio setup. Professionally built vocal booths can be found on Amazon, at music stores, or creatively improvised with household items. They serve the critical purpose of isolating the vocal track from unwanted room reflections and noise, ensuring clarity and purity in every take.
For those exploring home recording studio ideas on a budget, transforming a walk-in closet into a vocal booth can be a remarkably effective solution. The natural absorption properties of clothes combined with added acoustic panels can create an unexpectedly dry and controlled environment for vocal recordings. It's an excellent example of bedroom music studio ideas where space and resources might be limited.
Alternatively, utilizing a reflection shield or baffle around the microphone can significantly reduce room reflections. This method, while not as isolating as a full booth, can still enhance the quality of vocal recordings in home music studio setups. Attention to detail, such as adjusting the microphone placement to avoid frequency-specific ringing or reflections, underscores the importance of a meticulous approach to creating your recording space.
In the journey of setting up a home recording studio, the pursuit of capturing the perfect vocal cannot be overstated. Investing time and resources into a vocal booth or employing creative solutions for sound isolation can dramatically improve the mixing process, ultimately elevating the overall quality of your music productions.
4. Use a High Quality DAW or Mixing Software
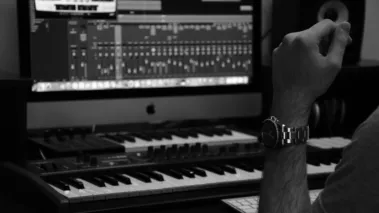
Elevating your home music studio with professional-grade mixing and mastering software is a game-changer. Initially, the allure of free plug-ins might seem appealing, but the transition to premium tools can significantly enhance your production quality and efficiency. High-quality software not only delivers superior sound but also streamlines your workflow, allowing you to become proficient with your toolkit.
For multitrack recording and mixing, we have reviews of industry staples like Ableton Live, Logic Pro X, and Pro Tools. Ableton Live is revered for its intuitive design and flexibility, making it a favorite among electronic music producers. Logic Pro X is lauded for its comprehensive suite of plug-ins and instruments, offering incredible value for Mac users. Pro Tools remains the industry standard for mixing and mastering, known for its precision and extensive third-party plug-in compatibility.
On the mastering front, software like iZotope's Ozone offers advanced mastering tools and AI-powered assistance, making professional sounding masters more accessible. Using a quality sample library, which you can find our reviews of here, as wav plugins, are also excellent options to assist with mixing and mastering.
The key is to focus on a few versatile, high-quality plug-ins and software tools. This allows for deep mastery of each tool's capabilities, improving the quality of your mixes and masters. Investing in your software setup is not just about enhancing your current projects; it's about investing in your ongoing development as a producer. By choosing the right tools, you align your home studio setup with professional standards, paving the way for a more productive and creatively fulfilling music production journey.
5. Use High Quality Headphones
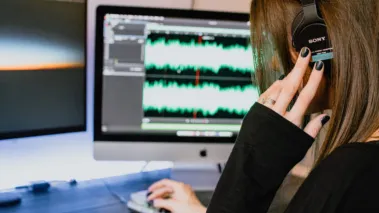
In the realm of home recording studio setup, using high-quality headphones to achieve the perfect headphone mix is crucial for every musician's performance. A bass player might prefer a mix with enhanced drum levels to lock in the rhythm, whereas a singer might request more guitar in their mix to better pitch their vocals. The key is to fine-tune the mix until it resonates with the performers, ensuring their utmost comfort and performance quality.
Monitoring headphone levels is essential to avoid bleed into the microphone—a common issue when vocalists monitor with one ear off. This practice requires precision to maintain the integrity of the recorded track. Closed-back headphones are the gold standard in recording environments for their ability to isolate sound. Among these, the DT 770 Pros stand out for their durability and sound quality, earning a spot as a favorite in both professional and home music studio ideas.
Spending time to perfect the headphone mix is more than a technical task; it's an investment in the emotional and technical quality of the performance. Adjusting levels to meet the nuanced needs of each performer can transform a good take into a great one, highlighting the importance of this often-overlooked aspect of recording.
Incorporating these practices into your bedroom recording studio ideas ensures that each recording session is as efficient as it is effective, laying the groundwork for a mix that meets professional standards while fostering a creative atmosphere for the artist.
6. Record at 24-bit/44khz or Better
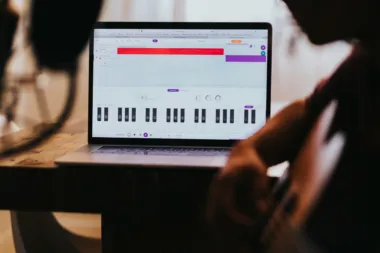
To optimize digital audio quality in your recordings, understanding bit depth and sample rate is crucial. A 24-bit/44.1kHz setting strikes a good balance, capturing detailed sound quality suitable for most home music studio ideas without demanding excessive storage space.
Elevating the sample rate to 48kHz can further refine audio clarity, particularly for projects where high fidelity is paramount, but keep in mind the increased file size. Recording beyond 48kHz often yields diminishing returns for home setups, making it an impractical choice given the minimal perceptible improvement in audio quality versus the additional storage required. This consideration is key in bedroom recording studio ideas, where efficient use of resources can impact overall project feasibility and quality.
7. Find Your Optimal Microphone Placement

Understanding microphone placement transforms your recordings from amateur to professional by capturing the true essence of your performance. Each microphone type serves a unique purpose, making the choice of mic as critical as its placement. Regardless of your mic's brand or cost, its setup is the real game-changer for quality sound in your home music studio ideas.
For optimal results, distance and positioning are key. Vocals should be recorded with the microphone positioned 6 to 12 inches away, employing a pop filter to reduce plosives and manage the "proximity effect" which overly emphasizes bass frequencies. This setup balances clarity and depth without introducing excessive room sound, which can detract from your recording's quality.
Angle and height adjustments further refine your sound. Positioning the mic capsule at a slight angle can mitigate sibilance, enhancing vocal clarity in the mix. Adjusting the mic's height encourages proper posture and vocal technique, contributing to a more natural and expressive performance.
These tips not only elevate the sound quality of your recordings but also streamline your home recording studio setup process, saving time and effort in post-production. Embracing these microphone setup strategies will significantly enhance your bedroom music studio's output, bringing you closer to achieving studio-grade recordings at home.
8. Invest in Your Mic Chain Configuration
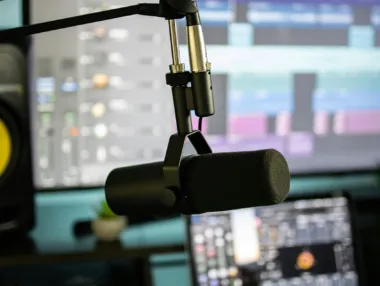
Crafting an impeccable home recording involves a blend of talent, ambiance, and, crucially, the right equipment. With the right mic chain, you're not just capturing sounds; you're capturing emotions, nuances, and the raw essence of music, adding up to a significant enhancement in your bedroom music studio's output. This integral setup is your bridge from the microphone to your digital workstation, consisting of the microphone itself, necessary cables, a preamp to boost signal quality, and an audio interface for digitizing your music. A comprehensive solution, like the Spire Studio, exemplifies the seamless integration of these components with its exceptional low-noise preamps and flexible recording capabilities, making it a standout choice for home recording studio setup ideas.
Spire Studio transforms recording by providing a high-quality, in-built microphone and the option to connect your mics or instruments directly, catering to a variety of bedroom recording studio ideas. Its portable design and compatibility with the Spire App for iOS enhance its appeal, allowing for effortless recording sessions. The standout Soundcheck feature intelligently sets levels and tones, mimicking a personal sound engineer's expertise to ensure your tracks are crisp and clear from the start. Simplifying the transition to mixing, Spire Studio lets you easily export tracks as high-quality WAV files, ready for further production.
For those looking to expand their microphone arsenal, striking a balance between versatility and quality is key. Incorporating a dynamic mic alongside a large diaphragm condenser mic can adequately equip your studio to handle a wide array of recording scenarios, from vocals to acoustic instruments. Opting for quality models like the Aston Origin or Shure SM7B proves that excellence doesn't always come with a high price tag, supporting the notion that smart investments in your home music studio ideas can lead to professional-level recordings without the professional-level expenses.
Investing wisely in your microphone chain and selecting versatile equipment can elevate your home recording studio from a creative space to a professional-grade studio, ensuring that every recording is not just heard but felt.
9. Triple Check Your Mixes
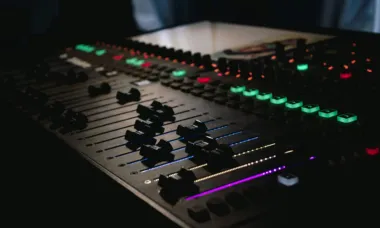
Testing your mixes across a variety of playback systems is a crucial step in achieving a balanced and professional sound, especially when working within the confines of a home studio. The acoustics of your recording environment, often unoptimized in home setups, can significantly color your perception of the mix. While studio monitors provide a high fidelity representation of your work, their accuracy can be compromised by the room's acoustics. Similarly, mixing on headphones, though a common practice among bedroom producers to avoid noise complaints, presents its own challenges such as accelerated ear fatigue and skewed frequency perception due to increased listening volumes.
To circumvent these issues, it's essential to listen to your mixes on as many different systems as possible. This could range from car audio systems, both high-end and standard, to various models of Bluetooth speakers, from the high-quality ones to those with less fidelity. Don't overlook the importance of testing on consumer headphones, smartphones, and computer speakers. Taking meticulous notes on how your mix translates across these mediums can highlight consistent flaws, like overly pronounced hi-hats or a lack of warmth, guiding you to make more informed adjustments.
Additionally, leveraging technology like Tonal Balance Control can provide an objective analysis of your mix's frequency spectrum. This plugin compares your mix against a database of genre-specific targets or directly to selected reference tracks, offering a visual representation of where your mix stands in relation to industry standards. It's a powerful tool for identifying and correcting imbalances that may not be apparent in your primary mixing environment.
By integrating these practices into your workflow, you'll not only ensure your mixes sound great across all playback systems but also gain deeper insights into the nuances of your mixing space. This holistic approach to mixing and mastering, supported by strategic use of software and a broad testing range, can dramatically elevate the quality of your productions, making your music resonate with listeners no matter their choice of audio device.
10. Create Studio Ambiance
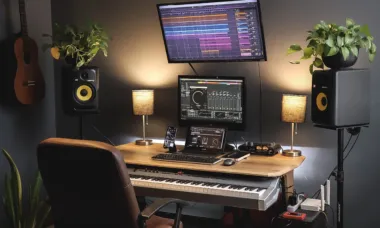
Crafting a vibe in your home music studio isn't just about the technical setup; it's also about creating a space that inspires creativity and comfort. The right studio vibe can elevate your music, transforming ordinary sessions into extraordinary ones. Here are some ideas to enhance the atmosphere of your home recording studio or bedroom music studio.
Lighting: Incorporating various lighting options, such as subtle LED lights, lava lamps, or even candles, can significantly affect the mood. Adjustable lighting lets you match the ambiance to the session's needs, whether you're aiming for high energy or a relaxed vibe.
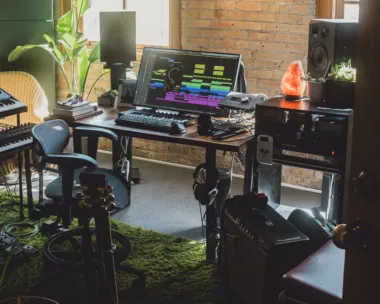
Decor: Adding personal touches with plush furnishings, Persian carpets, or art pieces can make the space inviting and stimulate creativity. These elements contribute to a comfortable and aesthetically pleasing environment, crucial for long sessions.
Sensory Balance: While engaging the senses, it's essential to maintain a balance. Subtle scents from salt lamps or carefully selected air fresheners can enhance the atmosphere without overwhelming it. The key is subtlety, ensuring nothing distracts from the music creation process.
Functionality and Flow: The layout of your studio should promote an easy workflow. Even in a bedroom recording studio setup, consider the placement of equipment and furniture to facilitate movement and interaction among musicians.
Investing time into these aspects of your home recording studio setup can make a significant difference in the recording experience. It's about creating a space where both technical quality and creative expression are maximized, embodying the essence of home recording studio ideas.



Leave a Reply!